On todays episode of Getting Dirty with the Dog, we're going to install a new grill.
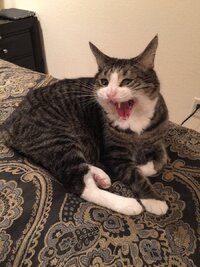
I'm your host, Rowdy, the Goodest Boy, and this is Tom, giving us a preview of the new grill.

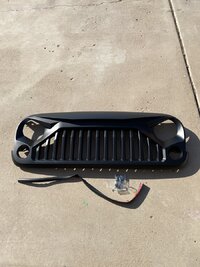
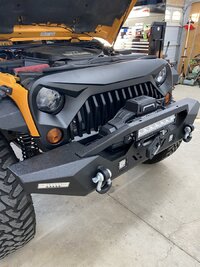
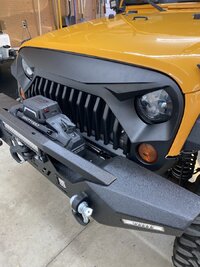
The Wrangler grill is iconic. So much so that when the YJ was introduced, with it's rectangular headlights, there were many people who insisted that it wasn't a "real" Jeep. There are still plenty of people who suffer severe sphincter spasm when they see a Wrangler with an aftermarket grill. And, like big light bars, some people see these grills as a sign of a mall crawler. That's ok. When they start paying your bills, then their opinion might count. If you're one of those people, skip past the rest of this post. Because todays we're installing THIS Angry Birds grill.
Inside the package you will find the grill (duh!), rubber seal, clips and plastic push rivets. You can absolutely reuse the OEM bits, but it's a nice touch to get new hardware. The grill has a very nice flat black finish, and can be painted, if you desire. In my case, I like the black on orange contrast, so I'm leaving it.
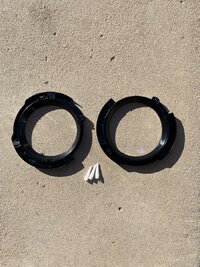
Since my passenger side headlight bucket was all wonky (that's a technical term, really it is...) I decided to replace them as well.
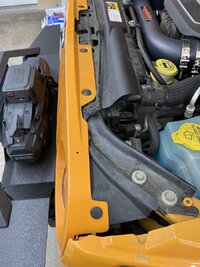
The obvious place to start is by removing your OEM grill. It is held in place along the top edge by plastic rivets. The easiest way I know of to remove them is to slip a small flathead screwdriver under the center pin and twist. That'll pop the pin up. Grab the panel and lift a bit. That will allow you to grab the rivet and pull it out.
The bottom edge is held in place by a half dozen trim panel clips. Just grab the grill and give it a yank. Once the clips are loose, the only thing holding it back are the parking lights. Some people squeeze the connection and disconnect it. I find it easier to give the whole thing a twist and remove the bulb. But you do you.

The parking light housing is held in place by two clips. Just press on the tabs and the lens will come right out the front.
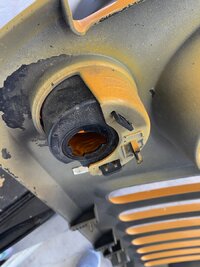
The headlight buckets are held in place by 3 pins, one of which doubles as the adjuster. Give them a firm yank and they pop out. Unplug the light. Remove the 4 screws holding the trim ring in place and reinstall the light in the new bucket. Position the new bucket on the pins and give them a light thump with your hand. You can adjust the aim now, or after the grill is replaced, but it is easier to do it now. The adjuster needs a T15 torx bit.
Now assemble the new grill. Push the clips onto the posts on the lower edge. Push the parking light housings in from the front till they click in place. Line up the clips with the holes on the nose of the Jeep. If you don't have a winch, just thump the grill over the clips and they will snap into place. A winch, however, will get in the way. My solution was to just stick a pry bar between the winch and the grill and push gently. Just be careful not to damage the finish. The rubber seal along the top edge is held in place with double-sided tape. Peal and stick.
Now go out and scowl at other vehicles.

I'm your host, Rowdy, the Goodest Boy, and this is Tom, giving us a preview of the new grill.


The Wrangler grill is iconic. So much so that when the YJ was introduced, with it's rectangular headlights, there were many people who insisted that it wasn't a "real" Jeep. There are still plenty of people who suffer severe sphincter spasm when they see a Wrangler with an aftermarket grill. And, like big light bars, some people see these grills as a sign of a mall crawler. That's ok. When they start paying your bills, then their opinion might count. If you're one of those people, skip past the rest of this post. Because todays we're installing THIS Angry Birds grill.
Inside the package you will find the grill (duh!), rubber seal, clips and plastic push rivets. You can absolutely reuse the OEM bits, but it's a nice touch to get new hardware. The grill has a very nice flat black finish, and can be painted, if you desire. In my case, I like the black on orange contrast, so I'm leaving it.

Since my passenger side headlight bucket was all wonky (that's a technical term, really it is...) I decided to replace them as well.

The obvious place to start is by removing your OEM grill. It is held in place along the top edge by plastic rivets. The easiest way I know of to remove them is to slip a small flathead screwdriver under the center pin and twist. That'll pop the pin up. Grab the panel and lift a bit. That will allow you to grab the rivet and pull it out.

The bottom edge is held in place by a half dozen trim panel clips. Just grab the grill and give it a yank. Once the clips are loose, the only thing holding it back are the parking lights. Some people squeeze the connection and disconnect it. I find it easier to give the whole thing a twist and remove the bulb. But you do you.

The parking light housing is held in place by two clips. Just press on the tabs and the lens will come right out the front.

The headlight buckets are held in place by 3 pins, one of which doubles as the adjuster. Give them a firm yank and they pop out. Unplug the light. Remove the 4 screws holding the trim ring in place and reinstall the light in the new bucket. Position the new bucket on the pins and give them a light thump with your hand. You can adjust the aim now, or after the grill is replaced, but it is easier to do it now. The adjuster needs a T15 torx bit.
Now assemble the new grill. Push the clips onto the posts on the lower edge. Push the parking light housings in from the front till they click in place. Line up the clips with the holes on the nose of the Jeep. If you don't have a winch, just thump the grill over the clips and they will snap into place. A winch, however, will get in the way. My solution was to just stick a pry bar between the winch and the grill and push gently. Just be careful not to damage the finish. The rubber seal along the top edge is held in place with double-sided tape. Peal and stick.
Now go out and scowl at other vehicles.


